
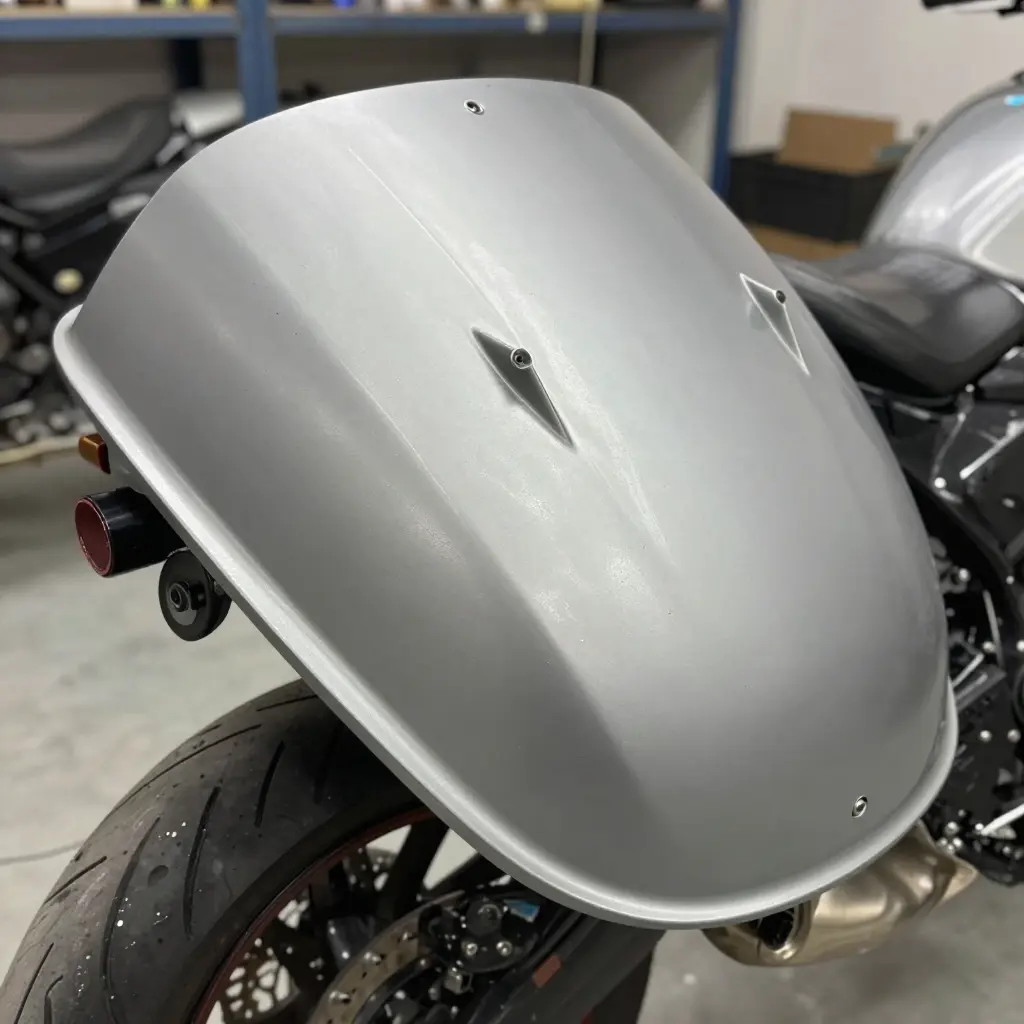
Aftermarket fairing fitment means checking that a replacement fairing matches the original bodywork’s mounting points, contours, and clearances. Get it right and the panel sits flush. Get it wrong and you fight every bolt. For owners, mechanics, and parts retailers, it is the first check that matters, and it happens before paint goes on. Mount tabs and panel gaps are where you do it.
Mount tabs are the small brackets and molded tabs that hold a fairing in place. A tab that sits off by a few millimeters can pull the panel, crack it, or set up a vibration at speed. Panel gaps show how evenly the fairing meets the fuel tank, seat, and side covers. When a gap runs uneven, the cause is usually a bent bracket, a warped panel, or the wrong part number.
Paint is where a fitment mistake gets expensive. A custom color or clear coat is costly and hard to undo, so a panel that does not fit has to be stripped and resprayed, or shipped back. Checking tabs and gaps on bare plastic also cuts returns and rework for shops and retailers. A dry fit takes minutes; repairing a painted panel takes days.
Why Mount Tabs Decide Whether an Aftermarket Fairing Fits
An aftermarket fairing kit is only as good as the points that hold it to the bike. Mount tabs are the small brackets, molded into the fairing or welded to the frame, that line the panels up. Get them right and the kit goes together; get them wrong and no amount of sanding will fix your fairing fitment.
How Tabs, Grommets, and Brackets Work Together
A mount tab on the fairing mates with a frame bracket on the motorcycle. Between the two sits a rubber grommet, usually with a metal collar. The grommet absorbs vibration, keeps the bolt centered, and keeps plastic from grinding against metal.
When all three align, the bolt slides through under light finger pressure. That is your first sign the geometry is right. If you have to force it, something is off.
Spotting Bent, Missing, or Misaligned Tabs
Inspect before you paint. Filler hides a gap; it does not fix alignment. Look for tabs that are cracked, bent, or snapped off, and compare the left and right sides, which should mirror each other closely. With the fairing dry-fitted, run a bolt through each hole. If it binds, the tab is probably bent or the frame bracket is tweaked.
A missing grommet is easy to overlook and expensive to ignore. Without one, panels rattle, bolts loosen, and cracks spread out from each hole.
Torque, Vibration, and the Slow Death of a Tab
Over-torquing crushes the grommet and stresses the plastic; under-torquing lets vibration work the bolt loose. Either way, thousands of miles of road buzz fatigue the tab until it fails. Follow the torque spec, add thread locker, and recheck the fasteners after the first ride.
The same discipline keeps whole fleets roadworthy, as these private fleet maintenance trends show. Treat every mount tab as a structural joint rather than an afterthought, and your aftermarket fairing kit will sit straight for years.
Mount Tab Alignment at a Glance
Before spending hours chasing panel gaps, know what you are looking at. The schematic below shows a fairing mount tab in its three common states: properly seated, walked sideways in the grommet, and bent out of shape. Compare it against what you feel and see on the bike.
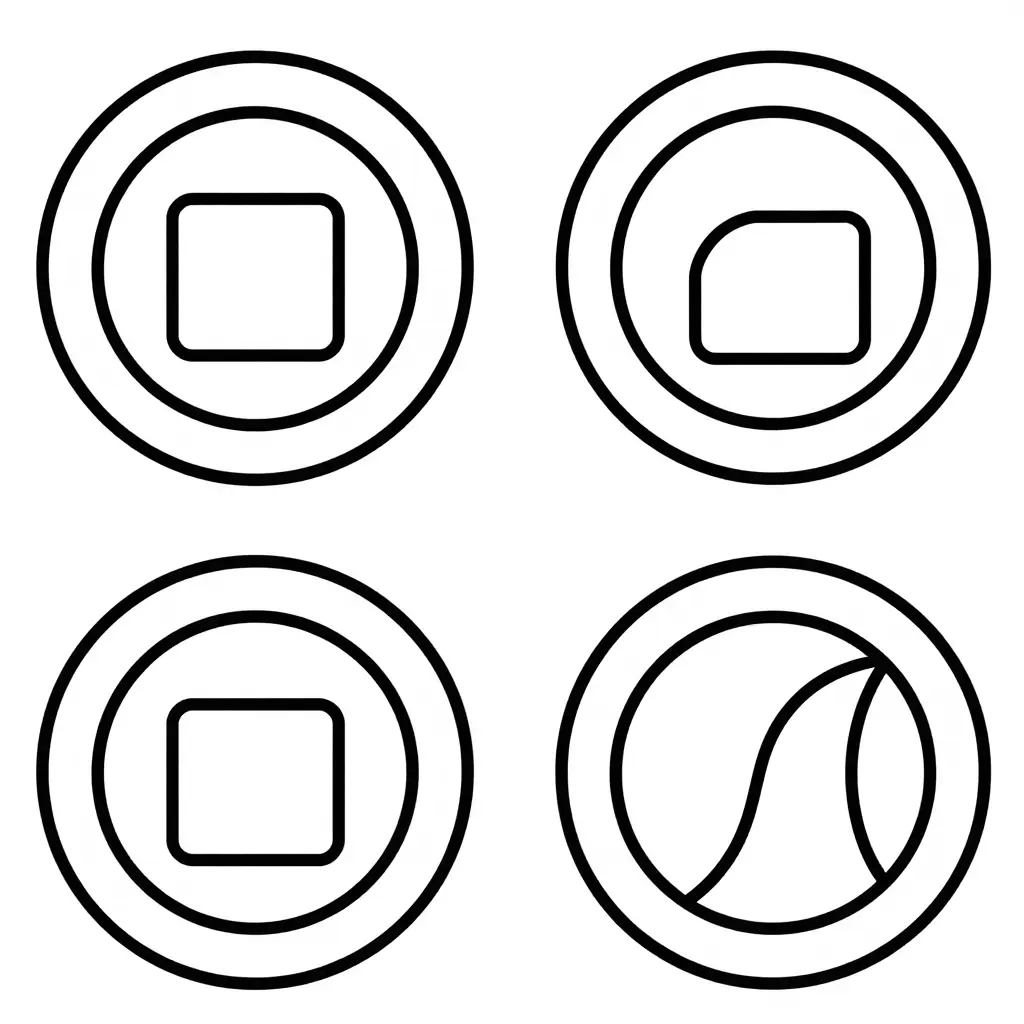
Match what you find to one of the three and you already know the fix: reseat the tab, swap the grommet, or bend and shim it before the panels go to the paint booth.
Mount Tab Inspection Checklist
Work through this sequence before you commit to paint so your aftermarket fairing fitment holds up at speed. Skip a step and you will pay for it later with cracked tabs and rattling panels.
- Gather your tools and lighting. A bright LED work light and a magnifying lens reveal defects that garage shadows hide during a rushed install.
- Clean every mounting surface first. Dirt and leftover adhesive can mask hairline cracks and throw off your measurements on the mount tabs.
- Inspect each tab for bends or cracks. Run a finger along the edge of every tab; a raised lip or a soft flex usually signals hidden stress damage.
- Check grommet condition. Cracked, hardened, or missing rubber grommets let vibration chew through the tabs and loosen panels over time.
- Confirm bracket alignment. Slide the bracket into position and verify the holes line up without forcing, because misalignment means flex that cracks paint later.
- Verify hardware thread condition. Thread each bolt in by hand first so you catch cross-threading or stripped threads before a torque wrench hides the problem.
- Check torque values. Tighten to the manufacturer’s spec with a calibrated wrench, since overtightening distorts tabs and undertightening invites rattles.
- Dry-fit the fairing panel. Bolt the panel on and run a fingertip along the seams to feel for uneven gaps before any paint goes on.
- Mark problem points. Use low-tack tape or a paint marker on any tab that is bent, cracked, or misaligned so nothing gets missed in the repair queue.
- Log any adjustments. Record every shim, bend, or replacement in a build sheet, a habit that mirrors sound proactive maintenance planning and keeps your fitment history clean.
Where Fairing Fitment Quietly Goes Wrong
Mount tabs carry the weight of every panel, soak up vibration, and hold the gaps in line at highway speed. That is why they are worth inspecting before primer and color coat. A tab that is off by two millimeters today becomes a distorted seam once the paint cures, and buffing will not hide it.
Start with a dry fit, hardware loose, and work from the center outward. Feel for resistance, listen for rattles, and watch for gaps that change shape when you press on them. Most fitment problems come back to the same few causes, mapped out below.
Common Mount Tab Problems and Fixes
| Problem | Likely Cause | Symptoms | Corrective Action |
|---|---|---|---|
| Bent tabs | Overtightened bolts or impact during shipping and installation | Panel sits crooked with uneven gaps on one side | Straighten with a soft-jaw vise or heat-assisted press; replace if the material is kinked or creased |
| Missing grommets | Lost during disassembly or omitted from the aftermarket kit | Vibration transfer, persistent rattling, cracked paint at contact points | Install the correct-size rubber grommets and confirm the kit includes every isolator |
| Misaligned brackets | Frame or subframe distortion, or a bracket built for the wrong model year | Fairing will not line up and bolts will not start by hand | Fit brackets loosely first, align to OEM reference points, then torque once everything seats |
| Cracked tab mounts | Stress fatigue, overtorquing, or prior crash damage | Visible cracks or hairline fractures and a tab that flexes under light pressure | Stop-drill the crack to halt propagation, then plastic-weld or replace the panel |
| Loose hardware | Missing lock washers, incorrect torque, or chronic vibration | Rattles, bolts backing out, and panel movement at speed | Add thread-locker and lock washers, then retorque to spec in a star pattern |
| Cross-threaded bolts | Starting bolts at an angle or forcing them into damaged threads | Bolt binds early, will not seat fully, or strips the threads | Remove the bolt and chase the threads with a tap; replace damaged bolts and clips |
Working Through the Reinspection
Fix structural problems before cosmetic ones. Straighten or replace bent tabs and cracked mounts first; a flexing tab will undo any alignment work and reopen gaps you just closed. Once the structure is sound, deal with damaged threads and worn hardware before final torque.
Tighten in a star pattern and work up to the manufacturer’s spec in stages instead of taking one bolt to full torque at a time. The even load keeps panels flat and avoids the tab distortion you are trying to prevent. Torque discipline is part of the preventive maintenance habits that keep vehicles out of the shop, long before a problem shows in the paint.
The panels should come off for prep only after every tab is straight, every grommet seated, and every gap even. Do the work now and the finished paint job reflects the fitment instead of the flaws underneath it.
Reading Panel Gaps Before Paint
Before the first coat of primer touches your fairing kit, read the seams between panels. Panel gaps are the visible lines where fairings, tank covers, and tail sections meet. Read them honestly and they tell you what you need to know about aftermarket fairing fitment, long before paint hides the truth or magnifies it.
Measuring Gaps with Simple Tools
You do not need a body shop’s budget to check alignment. Three inexpensive tools do most of the work:
- Feeler gauges – thin metal blades in graded thicknesses. Slide blades into a seam until one fits snugly; its marked size is your measurement.
- Gap cards – plastic gauges printed with common widths. They are faster for spot-checking many panels in a single pass.
- A caliper or flexible tape – handy for comparing the left and right sides of the same seam.
Measure top, middle, and bottom at each seam, and write each reading down. Consistency matters more than any single number.
| Panel Joint | Typical Acceptable Gap | Warning Sign |
|---|---|---|
| Side fairing to nose | 3-5 mm | Wider than 6 mm |
| Tank cover to frame | 2-4 mm | Left and right differ |
| Tail to seat cowl | 3-6 mm | Widens toward rear |
| Lower cowl to belly | 4-7 mm | Panels touch or overlap |
Treat these ranges as starting points. OEM panels often sit tighter, and aftermarket sets may run slightly looser, so confirm the kit maker’s spec.
What Uneven or Widening Gaps Really Tell You
A gap that stays constant is cosmetic. A gap that widens, pinches, or shifts side to side is mechanical, and it usually points to a bent or misdrilled mount tab, a twisted bracket, or a frame point that was never straight. If one side reads 3 mm and the other reads 8 mm, do not shim the panel; fix the tab. Forcing a fairing into place stresses the plastic, and those stress risers crack once heat and vibration set in.
Fix the tab and bracket geometry first, then re-measure. Move on to prep and paint only when the seams read evenly across the bike.
The Numbers Behind the Headaches
Before you reach for the sandpaper, know where aftermarket fairing fitment usually goes wrong. The bar chart below breaks down how often each problem shows up when owners and mechanics sort through a fresh set of fairings.
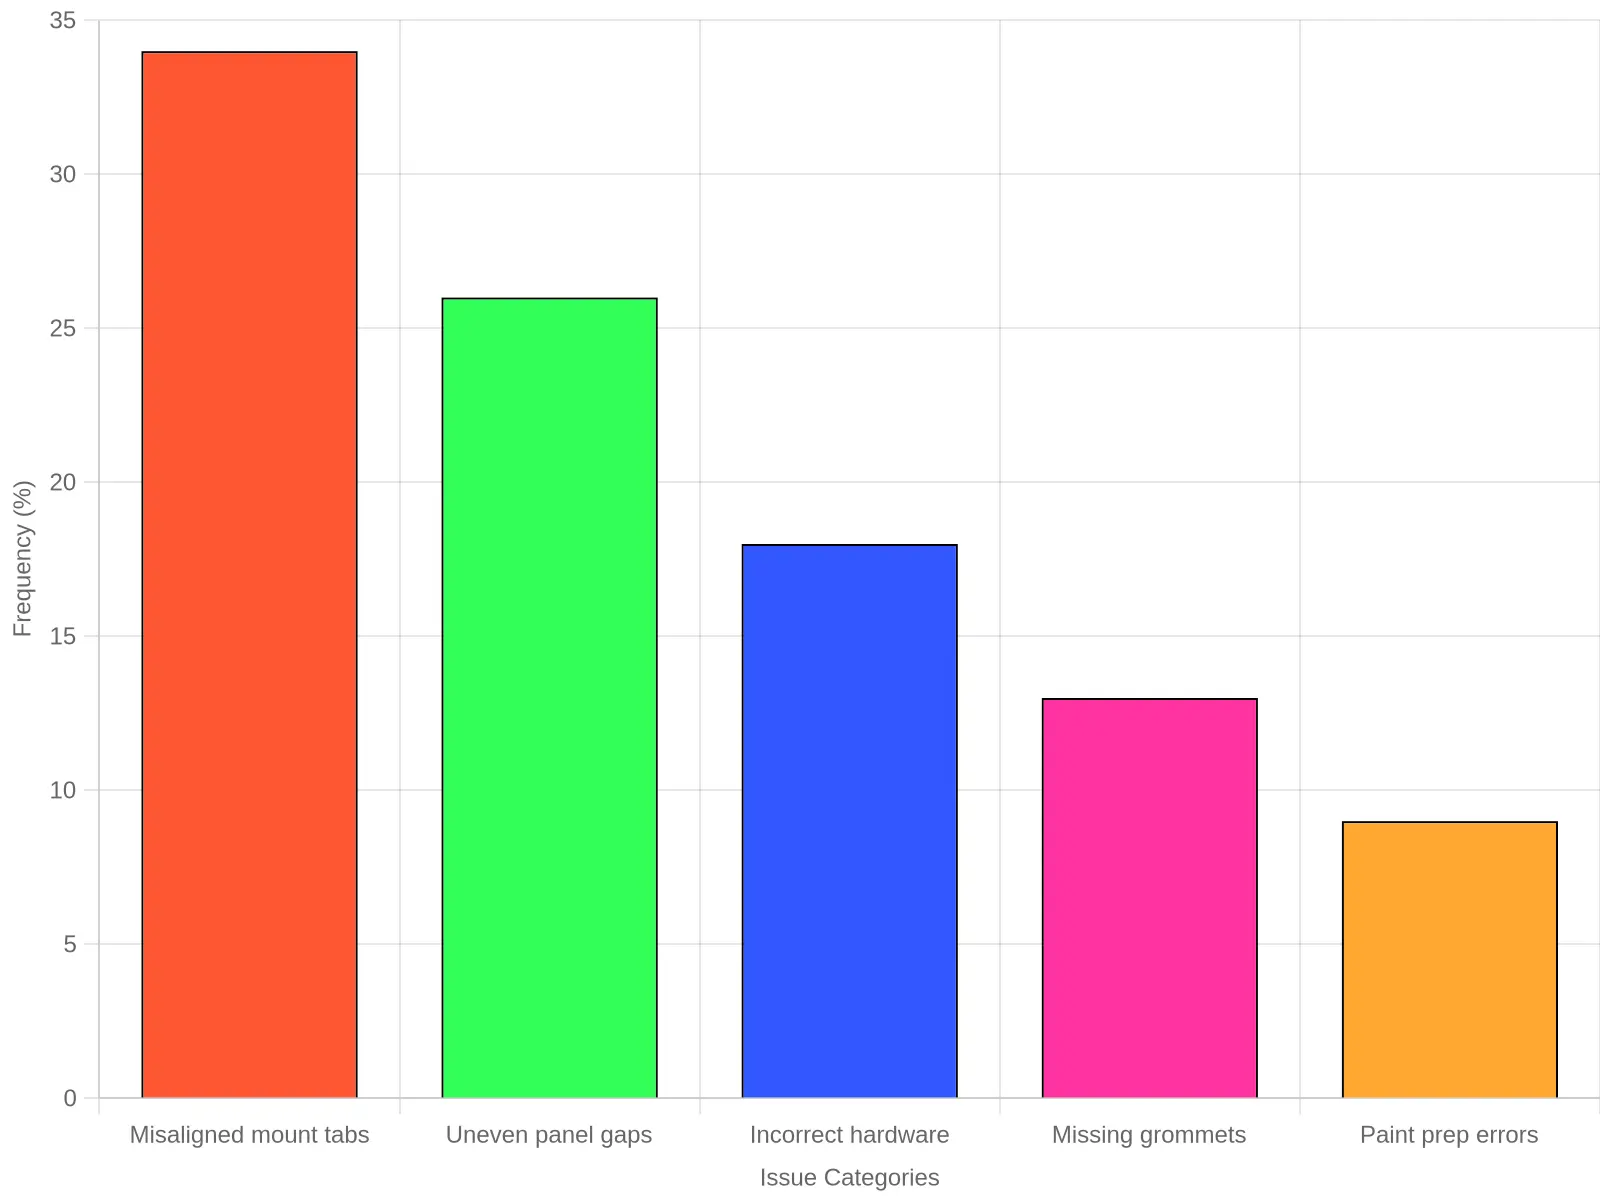
Takeaway: Misaligned mount tabs and uneven panel gaps account for roughly 60% of reported fitment issues. Test-fitting and measuring those two areas before paint is where the biggest savings in time and rework come from.
Panel Gap Targets to Check Before Paint
Lock in fitment before primer and topcoat. Uneven panel gaps hide under fresh paint until sunlight, or a customer, catches them. These are the tolerance targets worth checking on any aftermarket fairing set before the spray gun comes out.
- Consistent gap width: Aim for a uniform 3-4 mm gap between every adjacent panel, and measure at multiple points, since gaps often widen near curved edges.
- Symmetrical spacing across the fairing set: Left and right side panels should mirror each other within about 1 mm so the bike looks balanced from the front and rear.
- Flush panel alignment: Adjacent panels should sit flush, or within 0.5 mm, so no edge stands proud of its neighbor and catches wind or a rag.
- Edge reveal depth: Keep the visible reveal even along its full length; a wandering reveal strip is one of the fastest giveaways of a sloppy fit.
- Correct grommet seating: Confirm every grommet and rubber isolator seats fully in its hole before tightening, since a pinched grommet shifts a panel and changes the gap.
- Bolt hole alignment: Fasteners should drop in by hand without forcing; if you have to pry a tab, the panel gaps will twist once everything is torqued down.
- Reflection-line consistency: Sight down the bodywork under a bright light; reflections should run smooth and unbroken across seams, exposing alignment errors the eye misses head-on.
Check these panel gaps on the bike, fully assembled and torqued, before any paint touches the surface. For more on keeping equipment in top shape, review these maintenance trends for private fleets. Adjusting tabs and shim washers now is far easier than reworking a finished surface later.
Dry-Fit and Test-Fit Workflow Before Paint
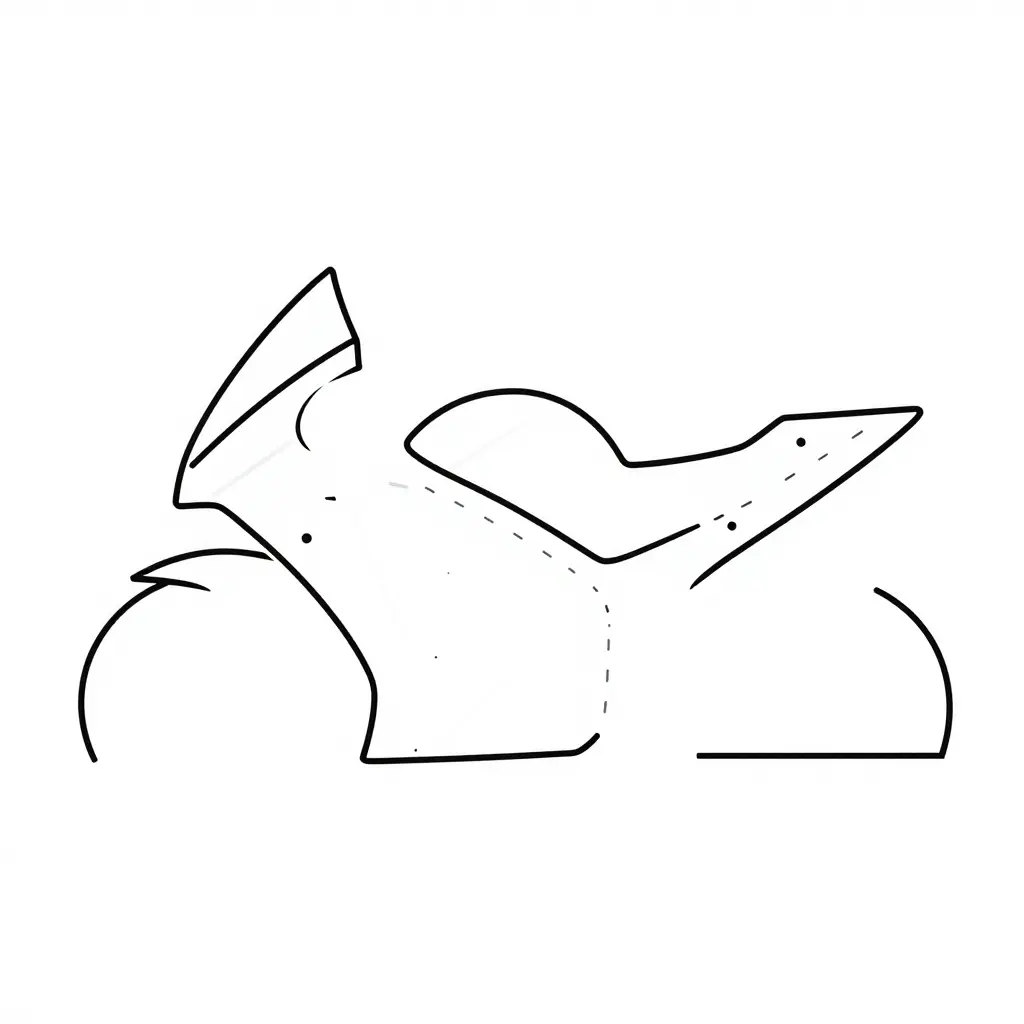
A good paint finish starts long before the spray gun fires. Assemble, test, and troubleshoot the kit while it is still raw and unpainted so scratches, stress cracks, and poor alignment never reach a fresh finish. The sequence below keeps owners and mechanics away from the most expensive mistake in the job: painting a fairing that does not fit.
Step 1: Mount the Kit Unpainted
Install every panel exactly as it arrives. Bolt on the fairing kit, side covers, and nose piece with the supplied hardware. Resist the urge to trim or sand yet; watch how the parts sit against the frame, tank, and subframe.
Step 2: Perform the First Test-Fit
Walk around the bike and check clearances. Look for contact points where panels rub the exhaust, radiator, or wiring harness. With everything assembled, test steering lock, seat removal, and mirror mounting, and write down every tight spot.
Step 3: Adjust Mount Tabs and Brackets
Bend, slot, or shim mount tabs so panels sit flush and free of tension. Loosen and realign brackets rather than forcing a bolt into place. A fairing held under stress cracks once engine heat and road vibration set in, and the flaw shows through new paint.
Step 4: Recheck Panel Gaps
Measure panel gaps between all mating surfaces. Even, parallel gaps, usually 3 to 5 mm, mean the geometry is right; uneven gaps mean another round of adjustment. This is where you confirm the kit matches the original bodywork.
Step 5: Commit to Paint
Only after alignment is locked in should you disassemble, prep, and paint. Photograph or tag your bracket positions so reassembly after painting is quick and repeatable.
Skipping the sequence is the fastest route to rework. Whether you run one project bike or a whole shop, disciplined fitment before paint saves hours, material, and money. The same fleet maintenance practices that keep service bays efficient apply here: check first, finish second.
Where Fitment Problems Actually Come From
Inspection is not one guess among many; it decides whether every later stage succeeds. The five problems below show up in a predictable order of frequency, based on what we flag during pre-paint mock-ups. Mounting points and panel alignment dominate the list, and paint prep trails far behind, which is a reminder that the structure underneath matters more than the finish on top.
The doughnut chart below breaks down the share of fitment issues by category.
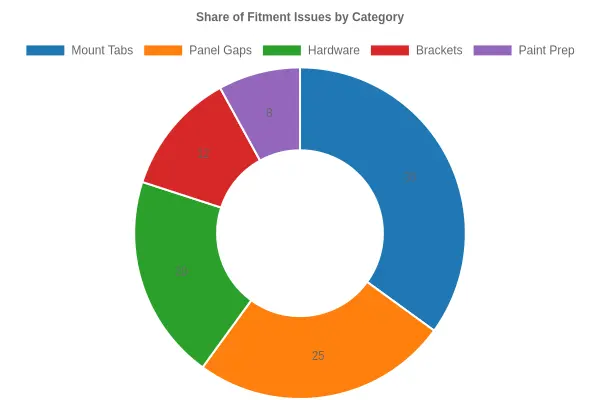
| Fitment Issue Category | Share of Issues |
|---|---|
| Mount Tabs | 35% |
| Panel Gaps | 25% |
| Hardware | 20% |
| Brackets | 12% |
| Paint Prep | 8% |
| Total | 100% |
Catching these defects before paint saves time and money. A tab that needs reshaping or a gap that needs shimming is a five-minute fix on bare plastic; once color is down, it becomes a re-spray, re-clear, and reassembly job.
Keep the categories above in mind as a checklist when you inspect a kit.
Choosing an Aftermarket Fairing Kit That Fits the First Time
When a rider, mechanic, or parts retailer orders an aftermarket fairing kit, the risk is not the color; it is the geometry. A panel that looks flawless in a product photo can arrive with warped curves, misaligned mount tabs, or hardware that will not thread. The way to avoid that is to evaluate the supplier before you buy, not after the box is open.
Start with mold fitment
Ask how the supplier builds its tooling. Reputable manufacturers pull their molds from OEM-spec scans rather than hand-laid copies, which keeps curves faithful to the original bodywork and holds panel gaps consistent. A supplier that can explain its molding process, tolerances, and quality checks is a better bet than one that only advertises colors and prices.
Confirm tab mounting precision
Fitment comes down to the mounting points. Ask for close-up photos of the tabs and confirm they are reinforced where stress concentrates. Pre-drilled, correctly spaced holes save hours of filing and cut the chance of cracks once the bike is on the road.
Verify hardware compatibility
Every kit should state which fasteners, grommets, and clips it includes, and whether they match OEM mounting hardware. Incomplete hardware is a hidden cost that shows up mid-install.
Retailers evaluating suppliers can apply this same checklist:
| Checkpoint | What to Confirm |
|---|---|
| Mold fitment | OEM-spec tooling, consistent panel gaps |
| Tab mounting | Reinforced, pre-drilled, evenly spaced tabs |
| Hardware | Fasteners, grommets, and clips match OEM |
| Support | Fast, knowledgeable answers before purchase |
Summit Fairings (summitfairings.com) is one example: more than 3,000 styles spanning nearly every motorcycle model, pricing that runs 10-40% lower than competing sites, and a six-hour response guarantee for customer questions. That range, price, and support make it easier to confirm mold fitment, tab alignment, and hardware details before an order ships.
Frequently Asked Questions About Aftermarket Fairing Fitment
Getting a fairing kit to sit right comes down to patience and prep. These are the questions riders and shops ask most often before reaching for the spray gun.
Do aftermarket fairings fit exactly like OEM parts?
Not always out of the box. Good kits get close, but aftermarket fairing fitment rarely matches factory tolerances exactly. The mold is a reproduction, so tabs, holes, and curves can sit a few millimeters off. Expect some light trimming, slotting, or gentle persuasion. Most discrepancies are minor and disappear once you align the panels properly. Cheap kits take far more work than premium ones, so budget accordingly.
How should I test the mount tabs before painting?
Dry-fit the whole kit first, with no paint or adhesive. Attach the panels loosely, then tighten the fasteners gradually in a crisscross pattern so the plastic is not forced. Inspect each mount tab for stress, cracking, or gaps where it meets the frame. If a tab has to flex more than a couple of millimeters to seat, stop and adjust before going further. Mark the problem spots with painter’s tape so you can come back to them.
What panel gap is acceptable between fairing pieces?
A consistent 3 to 5 millimeters is a realistic target for most aftermarket kits. Uniformity matters more than the exact number. Panel gaps that swing from one seam to the next look sloppy even when each gap is technically small. Walk around the bike and check symmetry on both sides; small adjustments at the tabs and nylon washers often close stubborn gaps without cutting.
Is test fitting before paint really necessary?
Yes. Skipping it is the fastest way to ruin a fresh finish. Once panels are painted, trimming and drilling risk chipping the edges and wasting material. A patient dry run also protects the clear coat from cracks caused by forced mounting. For a broader look at how maintenance planning pays off, see these private fleet maintenance trends.
How do I fix a bent mount tab?
Use heat, not force. Warm the tab gently with a heat gun or hair dryer until it turns pliable, bend it into position, and hold it until it cools. Cold plastic snaps if you yank it. For badly damaged tabs, reinforce with a small aluminum bracket or two-part epoxy, and recheck alignment afterward, since straightening one tab can shift the gaps nearby.
What hardware helps with stubborn alignment?
Rubber or nylon washers and slotted holes give you room to move a panel without stressing the plastic. Keep the fasteners snug rather than cranked down, and revisit them after the first ride.
Conclusion
Checking mount tabs and panel gaps before paint decides whether a fairing project succeeds. Aftermarket fairing fitment problems rarely stay hidden once color is applied. An uneven mount tab, a twisted bracket, or a misaligned gap cannot be sanded or buffed away; correcting one after paint means stripping, reshaping, and spraying again. For owners, mechanics, and parts retailers, verifying alignment on a bare, unpainted fairing is far cheaper than reworking a finished one.
The practical pre-paint checklist stays consistent across all three groups:
- Inspect every mount tab for cracks, bends, or thin material that could snap under vibration.
- Test-fit each panel with the correct fasteners and confirm bolts thread without forcing.
- Measure panel gaps along the seams and adjust brackets until spacing is even on both sides.
- Check clearance around the tank, seat, forks, and exhaust before committing to paint.
- Mark and photograph trouble spots so adjustments are documented and repeatable.
Good prep also reflects a broader maintenance discipline, including the trends shaping private fleet maintenance that reward inspection over guesswork. Verifying fitment before painting is the most reliable way to get the result you want and avoid rework you did not have to pay for.